How to install an all-in-one solar street light ?
Nov 07, 2024
As an energy-saving and environmentally friendly road lighting device, the all-in-one solar street light is easy to install, does not require cable connection, and has low maintenance costs. It is suitable for remote areas, roads, parking lots and other places. This article will introduce in detail how to correctly install the all-in-one solar street light to ensure its long-term stable operation.
1. Installation preparation
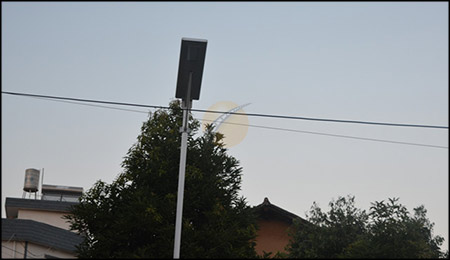
Choose an installation location Choose an installation location that can receive sufficient sunlight to avoid surrounding trees, buildings and other obstructions that block light and affect the charging efficiency of solar panels.
Prepare installation tools The tools required for installation include measuring tools, levels, screwdrivers or wrenches, anchor bolts, concrete foundations and other materials. If the street light is high, you need to prepare a ladder or lifting equipment to ensure the safety of the installation process. Foundation preparation At the location where the light pole needs to be installed, lay a good foundation according to the installation height and ground conditions. For soil or grass, it is recommended to dig a pit and fill it with concrete to stabilize the light pole; on concrete ground, it is necessary to drill holes according to the size of the base.
2. Installation steps
1. Fix the light pole
Mark the installation hole position
Place the base of the light pole on the foundation position, and mark the drilling point on the ground with chalk or a marker to ensure that the drilling position matches the base bolt hole.
Install foundation bolts
If installed on a concrete foundation, use an electric drill to drill holes at the marked points, then insert expansion bolts or anchor bolts and tighten with nuts.
Install the light pole
Align the base of the light pole with the bolts on the foundation and tighten with nuts to ensure that the light pole remains vertical. Use a level to check the horizontal angle to ensure that the light pole is stable and upright.
2. Install the lamp
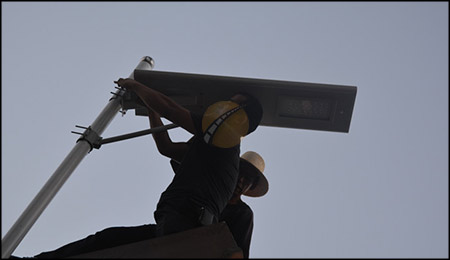
Fix the integrated lamp head
According to the height of the lamp pole, install the integrated lamp head on the top of the lamp pole. Secure the lamp with bolts or clamps, ensuring that it is facing downward to ensure the lighting effect.
Adjust the angle of the solar panel
In order to maximize the light received by the solar panel, it is recommended to adjust the tilt of the panel according to the local latitude angle, usually facing south for the best lighting effect.
3. Check system connection
Light sensor and automatic switch test
Use the sunshade to simulate the night to ensure that the solar outdoor light automatically lights up, and then restore the light to confirm the automatic extinguishing function. Check whether the light sensor is working properly to ensure that the light automatically lights up at night and automatically charges during the day. Battery check
Most integrated street lights have built-in batteries. Ensure that the battery is charged normally and can provide continuous power. If the battery needs to be replaced, ensure that its wiring is safe and correct.
III. Final test and adjustment
Bolt tightening check
Make sure all bolts are tightened to prevent the street light from shaking or tilting due to weather, wind and other factors.
Functional test
After charging is completed, test the lighting time to ensure that the battery can support lighting all night. If the lighting time is insufficient, adjust the angle or replace the battery to achieve the best effect.
Daily maintenance
Clean the solar panel regularly to prevent dust or fallen leaves from blocking the light. At the same time, check the operation of the lamp and battery to ensure the long-term stable operation of the solar road light.
The installation steps of the integrated solar led street light are simple, but attention should be paid to the stability of the foundation, angle adjustment and connection of components such as batteries during installation. With proper installation and maintenance, all-in-one solar street lights can effectively provide lighting and are an economical and environmentally friendly lighting option that brings convenience and benefits to road safety and community environment.
1. Installation preparation
Choose an installation location Choose an installation location that can receive sufficient sunlight to avoid surrounding trees, buildings and other obstructions that block light and affect the charging efficiency of solar panels.
Prepare installation tools The tools required for installation include measuring tools, levels, screwdrivers or wrenches, anchor bolts, concrete foundations and other materials. If the street light is high, you need to prepare a ladder or lifting equipment to ensure the safety of the installation process.

2. Installation steps
1. Fix the light pole
Mark the installation hole position
Place the base of the light pole on the foundation position, and mark the drilling point on the ground with chalk or a marker to ensure that the drilling position matches the base bolt hole.
Install foundation bolts
If installed on a concrete foundation, use an electric drill to drill holes at the marked points, then insert expansion bolts or anchor bolts and tighten with nuts.
Install the light pole
Align the base of the light pole with the bolts on the foundation and tighten with nuts to ensure that the light pole remains vertical. Use a level to check the horizontal angle to ensure that the light pole is stable and upright.
2. Install the lamp
Fix the integrated lamp head
According to the height of the lamp pole, install the integrated lamp head on the top of the lamp pole. Secure the lamp with bolts or clamps, ensuring that it is facing downward to ensure the lighting effect.
Adjust the angle of the solar panel
In order to maximize the light received by the solar panel, it is recommended to adjust the tilt of the panel according to the local latitude angle, usually facing south for the best lighting effect.
3. Check system connection
Light sensor and automatic switch test
Use the sunshade to simulate the night to ensure that the solar outdoor light automatically lights up, and then restore the light to confirm the automatic extinguishing function. Check whether the light sensor is working properly to ensure that the light automatically lights up at night and automatically charges during the day.

Most integrated street lights have built-in batteries. Ensure that the battery is charged normally and can provide continuous power. If the battery needs to be replaced, ensure that its wiring is safe and correct.
III. Final test and adjustment
Bolt tightening check
Make sure all bolts are tightened to prevent the street light from shaking or tilting due to weather, wind and other factors.
Functional test
After charging is completed, test the lighting time to ensure that the battery can support lighting all night. If the lighting time is insufficient, adjust the angle or replace the battery to achieve the best effect.
Daily maintenance
Clean the solar panel regularly to prevent dust or fallen leaves from blocking the light. At the same time, check the operation of the lamp and battery to ensure the long-term stable operation of the solar road light.

The installation steps of the integrated solar led street light are simple, but attention should be paid to the stability of the foundation, angle adjustment and connection of components such as batteries during installation. With proper installation and maintenance, all-in-one solar street lights can effectively provide lighting and are an economical and environmentally friendly lighting option that brings convenience and benefits to road safety and community environment.


