How to Test a Solar Street Light
Nov 12, 2024
Testing a solar street light ensures it is working optimally before installation or during maintenance. The process involves examining key components, including the solar panel, battery, LED lights, and controller, to confirm they are functioning as expected. Here’s a comprehensive guide on how to test a solar street light:
1. Inspect the Solar Panel for Performance
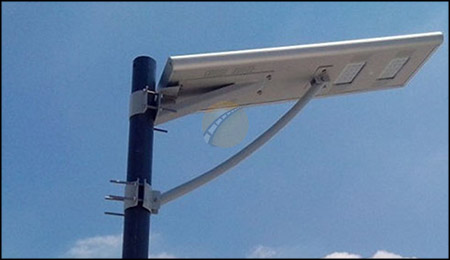
- Visual Inspection: Start by examining the solar panel for any visible damage, such as cracks, dirt, or scratches, as these can impact its ability to absorb sunlight efficiently.
- Voltage Test: To ensure the panel is producing power, use a multimeter to measure its output voltage under sunlight. Connect the multimeter probes to the positive and negative terminals of the panel. A reading close to the rated output (often 18-24V for a 12V system) indicates it’s generating power.
2. Examine the Battery Health
- Charge Capacity Test: The battery should be able to store energy and provide power to the light. Fully charge the battery using the solar panel or an external charger, then observe its discharge rate over time. If it discharges too quickly, the battery may need replacement.
- Voltage Check: Use a multimeter to measure the battery voltage. A fully charged 12V battery should read around 12.6-13.7V. Lower readings could mean the battery is not fully charged or has deteriorated.
3. Test the LED Light Fixture
- Visual Brightness Test: Switch on the solar led street light in a dim or shaded area and observe the brightness. A properly functioning LED should emit bright and consistent light.
- Power Consumption Test: Using a multimeter, measure the current drawn by the LED fixture and compare it to the manufacturer’s specifications. Significant deviations may indicate an issue with the LEDs or wiring.
4. Check the Light Sensor and Automatic Controls
- Day/Night Function Test: Cover the light sensor (often located near the solar panel) to simulate nighttime conditions and check if the light automatically turns on. Uncover the sensor, and the light should turn off in response to daylight.
- Time Control Setting: If the solar street light has a timer or dusk-to-dawn feature, check that these controls work correctly by simulating various conditions or using the control interface.
5. Evaluate the Solar Charge Controller
- Check Power Flow: The controller manages the power between the solar panel, battery, and LED light. Connect the multimeter to measure the controller’s input (from the solar panel) and output (to the battery and LEDs) voltages. Proper readings indicate that it is efficiently managing power distribution.
- Error Indicators: Many controllers have built-in indicator lights or LCDs. Check these for any error messages or warnings that indicate malfunction, such as overcharging or low voltage.
6. Simulate Real-World Conditions
- Run Time Test: Fully charge the solar outdoor light, then allow it to operate overnight. This test confirms its battery life and energy efficiency in real-world conditions, ensuring it can maintain lighting through the night.
- Weather Resistance Check: Inspect all sealing and waterproof features to ensure the unit can withstand outdoor conditions like rain and wind. This is essential for durability and consistent performance.


